
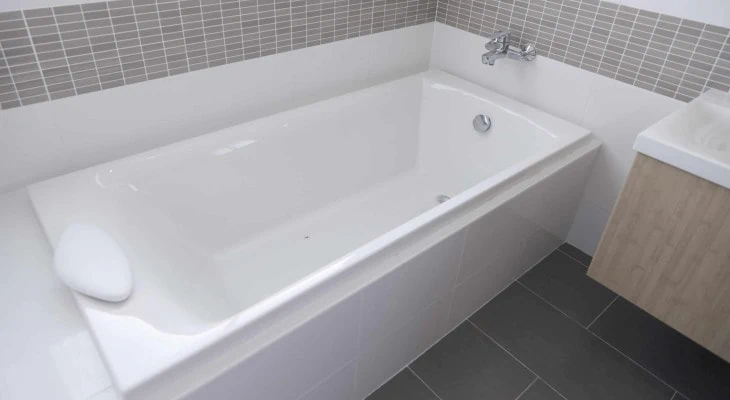
Whether we’d care to admit it or not, a functional bathroom and tub/shower unit in any residential house is an important factor to happiness in the household. Even the slightest inconvenience is enough to spell trouble in the tub.
Deciding what to do when the lip of the bathtub sticks out is often confusing. However, when faced with this problem, assess the situation and plan carefully.
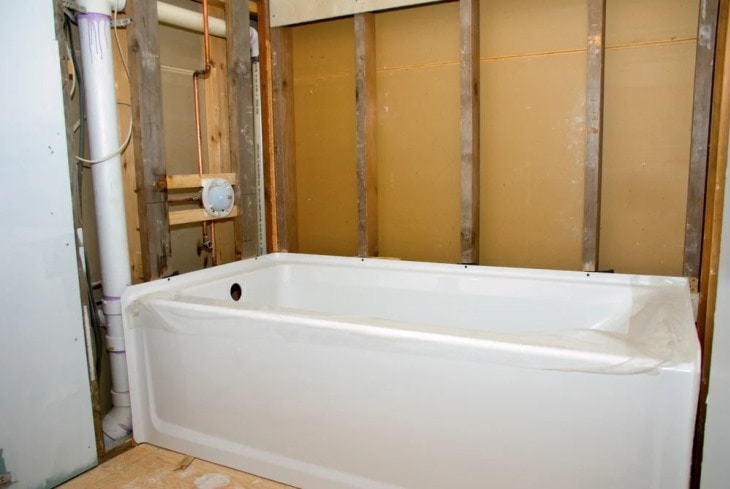
To fix a bathtub lip that sticks out, start by installing proper waterproofing — 2 or even 3 layers are necessary. Then, either place shims to account for the space created by the lip or cut the backer board around the lip to create a flat surface to tile.
Table of Contents
Solution #1 – The Shim and Furring Strip Method
The first solution I have found to this problem is to use shims or furring strips.
Waterproofing the Bathtub Walls

First of all, you need to adequately waterproof the area. Take a 14-15 cm strip of rubber adhesive-backed flashing tape and run it along the top edge of the bathtub lip, sticking and stapling it to the studs behind.
Then, take a roll of thin (4-6 millimeter) plastic waterproof sheeting and cover the 2 bathtub walls up to a height of 90 cm from the rim of the tub.
Overlap the Two
As you do this, make sure to overlap the plastic sheeting onto the adhesive flashing. This will lower the chances of water getting behind the tub and rotting the plywood and studs.
Fixing the Shims or Furring Strips
Once the two walls of the bathtub are fully waterproofed, take your shims or furring strips and attach them to the wooden studs, so they are flush with the lip of the tub. This will bring out the wall enough to provide a flat surface for the backer board and tiles to be installed on.
Will It Look Nice?
However, this does leave the bathtub walls sticking out 1-2 cm ( the width of the tub lip) from the rest of the bathroom walls. Making up for this difference can be tricky and won’t leave the bathroom looking as symmetrical.
Solution #2 – Cut the Backer Board to Fit around the Tub Lip
If you are the type that enjoys a beautiful bathtub with even walls to match, this second method is for you. This way will solve the problem with no uneven wall issues.
Make Sure to Waterproof!
As before, it is crucial to ensure that the 2 walls surrounding the tub are fully waterproofed. Follow a similar method as before, installing adhesive and plastic sheeting to the required dimensions.
Leave Space When Needed
When installing the plastic sheeting, especially in a bathroom with an exterior wall, make sure you leave space for air to escape between the insulation and plastic.
If warm air cannot escape, it will condense onto the plastic and begin to rot the studs.
Installing the Backer Board

Once the waterproofing is complete, the next step is to install the backer board. The backer board is attached on top of the studs and waterproofing material, providing a flat surface to tile on.
What Backerboard is the Best Option?
From my experience, waterproof cement backer boards are the best option as it is strong and unlikely to crumble and disintegrate during installation. Cut the backer boards to size using a carbide-tipped scoring knife or a jigsaw.
Cutting the Backer Board around the Bathtub Lip
Step two of the backer board installation is cutting and fitting it around the bathtub lip. Normally, it is best to place the backer board over the tub lip to ensure no water gets behind to rot the wood.
However, because the walls of the bathtub need to remain on the same vertical plane as the walls in the rest of the bathroom, moving it forward and over the lip isn’t an option.
Cut Carefully
To account for the width of the lip while still ensuring the walls remain on the same plane, you need to cut the backer board to fit it around the tub lip.
This method produces a waterproof solution, keeps the walls on the same plane, and leaves a flat surface to tile on.
Use the Right Hardware
Once the backer board is cut to size, screw it to the studs with bugle head backer board screws. Use an impact driver, not a regular drill, since screwing into the cement backer board will be difficult.
Make a Good Joint in the Corners
When installing the hardie backer board, overlap the two sections where they meet in the wall’s corner. This will ensure a good joint. Once all these processes are complete, you can successfully accommodate the bathtub lip, and the area will be ready for tiling and caulking.
Additional Tips to Fix a Bathtub Lip that Sticks Out
Use the Correct Cutting Tools
When cutting the hardie backer boards to size, never cut them indoors with a high-speed grinder. This will create a dust hazard. Always use a carbide-tipped scoring knife or jigsaw.
Waterproof Correctly and Completely
If you are replacing the old bathtub with a new one, take the time to lay down a plastic sheet under the new tub. As the years pass and the caulk fails, the water will stay trapped by the plastic and will not seep into the wood below.
Don’t Skip Steps to the Process
It is important not to skip steps when waterproofing your bathtub! Build as if you were waterproofing outdoors!
Trust me, if you do notice rotting 5 or 10 years later, you will have a much bigger project on your hands than just waterproofing the tub again!
Final Thoughts
Follow this guide, and you’ll be able to account for the bathtub lip sticking out and still have a waterproof, aesthetically pleasing bathroom area. Time to bathe happily in peace!