
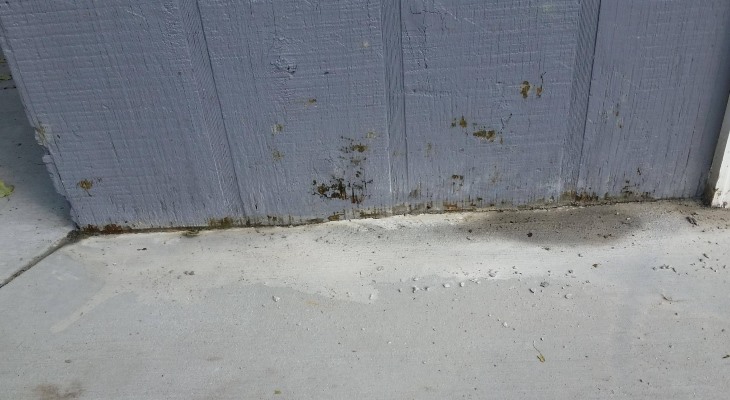
Sealing the gap where your siding meets concrete is important if you want to avoid future problems with moisture. It can also improve the appearance of your home. The process is relatively simple, but requires some attention to avoid some common mistakes.
Installing flashing requires a clean surface and proper sealing once the flashing is in place. You should apply caulk generously to ensure that no water can get in. Make sure to verify that flashing is an appropriate option where you’re installing it – you may sometimes want to avoid using any flashing at all.
Table of Contents
What is Flashing and Why is It Needed?
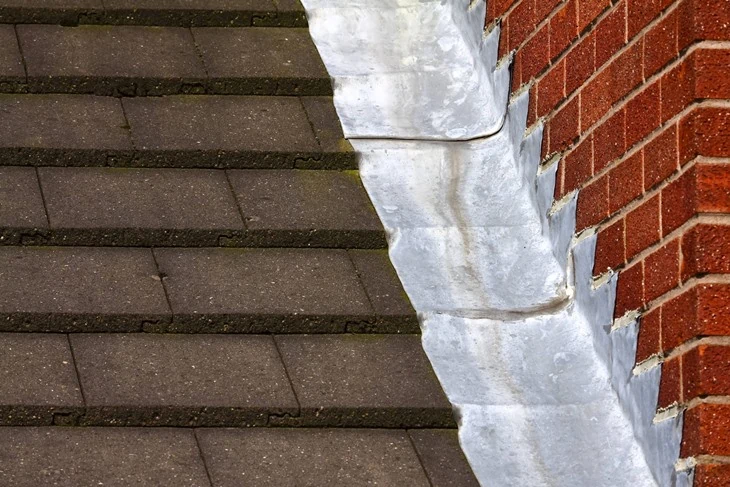
The small strips of waterproof material that you would often see running along the side of a wall where it meets another surface are called flashing. Its purpose is to prevent water from getting in, as those spots typically create openings that can be very problematic if not sealed properly.
Sealing your flashing properly is the most important part of the process. It helps ensure that water will stay out and minimizes any additional maintenance required on the flashing in the future.
Choosing Appropriate Flashing
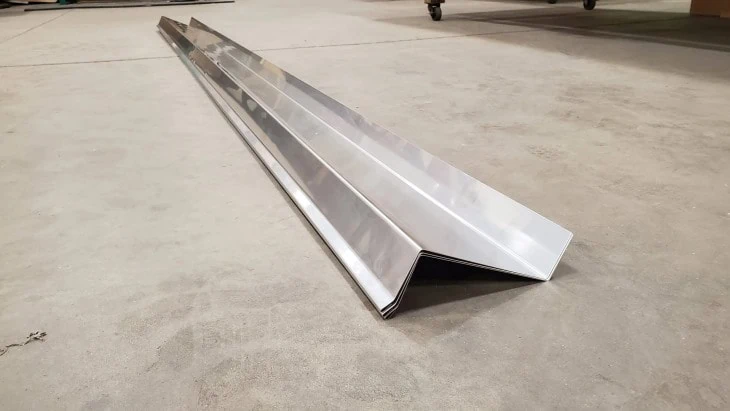
Flashing should generally be made of metal when used for siding. Many metals offer a good balance between durability and pliability, allowing you to easily bend the edge of the strip to ensure that it closes the seal properly.
You might find flashing tape at some stores. It’s not recommended to use it for the siding of your home, as it will likely lose some of its durability over time. This is especially true if the gap you’re trying to seal is very close to the ground.
When in doubt, get a professional consultation before you begin. There might be some specialized options available that work for your specific scenario.
Preparation Steps

Before you begin the installation of your flashing, you should ensure that your concrete is as clean as possible. This will minimize the risk of leaving any unexpected gaps. Polish any exposed concrete as hard as you can to even it out.
Next, look for any cracks. Fill them in with polyurethane or a similar material and wait for it to set before moving on to the next stage of the project.
Finally, make sure your flashing is cut correctly. Pay attention to strips that will be used for the corners. You might have to specifically cut them to create a proper mitre joint.
Depending on the type of flashing you’re using, that might not be necessary. This is common with flashing that’s too thin to require mitring in the first place.
In those cases, provided the type of metal you’re using allows for some significant bending, you might even be able to bend the corners inwards to close them off. Make sure to first test this on a small piece that you don’t mind destroying.
Installing Flashing
When you’re ready to start installing your flashing, it’s a good idea to begin with the corners. Those will serve as your guide for the remaining strips. Starting at the corners will also help you sort out any issues like small gaps resulting from flashing sticking out just a little bit beyond the corner.
As we mentioned above, be generous with your caulk / sealant. Make sure to apply it evenly at every step of the process and check for gaps after each application. Plan ahead to minimize any downtime while waiting for the sealant to cure.
Once you’re done putting in all the siding, run an extra layer of sealant on top of the whole installation. This will help close off any gaps that are too small to see with a naked eye. You may need to wait a while between each application of your sealant, depending on how long it needs to cure.
Cosmetic Touches
Painting and other cosmetic touches should only be done once you’re completely finished with sealing the flashing. Some paints might interact in an unpredictable manner with the sealant you’ve chosen if it hasn’t been allowed to cure properly.
You may also want to shave off any edges left by excessive sealant application. If you used a lot of sealant, the surface will likely be uneven and will require some additional work to get it to look nice.
This is not crucial for ensuring that the sealing works well, but will help improve how everything looks once you’re finished. If you’re installing flashing on your home, you should definitely do that.
Final Thoughts
Installing flashing and ensuring it’s properly sealed isn’t complicated. It mostly comes down to liberal use of sealant and ensuring that you leave no gaps at any stage of the process.
You should give your work a final verification at the end to ensure that there are no uneven parts or any gaps left.