
Got a soggy yard? Win the battle against a flooded lawn with a properly designed drainage ditch! A drainage ditch drains the water from the soaked part of your lawn and allows the water to flow elsewhere. The simple steps in this detailed guide will show you how to build a drainage ditch from start to finish!
A drainage ditch is a great way to drain excess water from a lawn. Create a trench with a slope away from the soaked area of the yard. Lay landscape fabric and gravel along the bottom. Install a drain system at the high point of the trench. Connect pipes to the drain to carry the water safely away from your yard and home. Cover the pipes with gravel, soil, and grass.
Table of Contents
Reasons to Dig a Drainage Ditch
Yard flooding can cause issues for grass, plants, and your home. Excessive moisture pooling around plant roots can cause rot, decay, and eventually kill the plants. If water gets into your foundation or basement, it can cause water damage and mold issues.
Important Questions
Don’t just jump in and dig! Answering some key questions can help you plan your drainage ditch project.
- Where is the water coming from?
- Where is the water collecting?
- Where can you send the water that won’t cause any damage to your property or someone else’s property?
Materials Needed
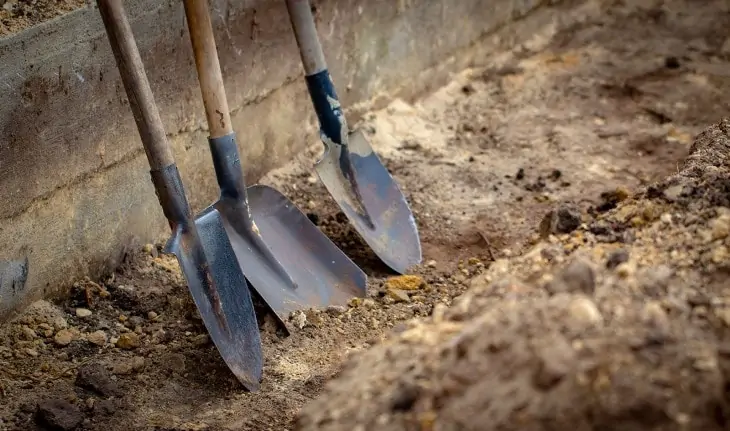
- Trenching shovel or regular shovel
- Landscape trencher (optional)
- Spray paint
- String
- Stakes
- Ruler
- Marker
- Level
- Topsoil
- Gravel
- Sand
- Large rocks (optional)
- Drainage pipe
- Drain grate
- Drain outlet
- Turf or grass seed (if desired)
- Landscaping stones (if desired)
Clear the Area
Check with your local utility companies before you dig! Most companies will come out and mark utility lines for free. Avoid digging where there may be gas, water, cable, or electric lines.
Mark the route for the drainage ditch with spray paint. Remove any trees, bushes, or plants that are in the way of your ditch.
Measure the Slope
You want your drainage ditch to carry water away from your home. So, the ditch will need to slope away. The rule of thumb for proper drainage is one inch of downward slope for every ten feet. There is an easy way to figure this out!
Take the stakes, and mark one-inch intervals along each stake. Place one stake, and bury it up to the one-inch mark where you want to start your drainage ditch. Take the other stake, and bury it up to the same point at the end of the planned ditch.
Tie a string from one of the stakes to the other. Use the level to make sure the string is level. What is the difference in height between the two stakes? How long is the string? As long as you have at least one inch of downward slope per ten feet of length, the ditch should drain properly.
If your yard does not slope in the proper direction, you will need to create that slope within the ditch.
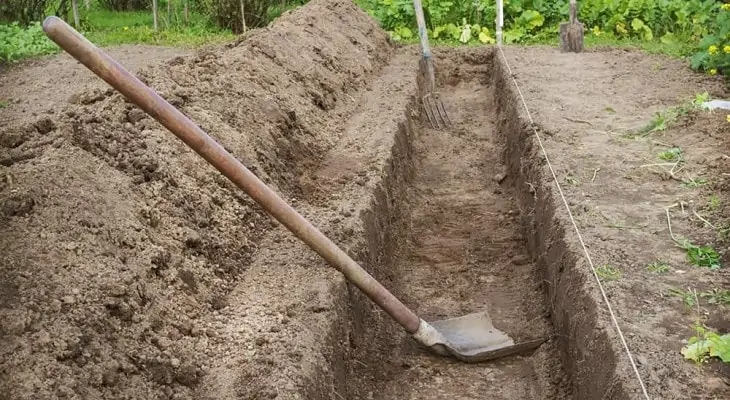
Trench Digging
Once you have a plan and have measured your slope, it is time to dig! Use a shovel, or, better yet, a trench digger. Remember that you will be adding gravel and pipe to the ditch, so be sure to dig the ditch deep enough for the extra materials.
Optimal Dimensions
Dig the ditch at least 9-12 inches wide, and 18 inches deep. If you are using a pipe that is large in diameter, you may need to make the trench even bigger.
Account for the Slope
Remember your slope measurements? If your yard is flat, or the slope doesn’t descend at least one inch for every ten feet, make sure the trench makes up for that slope. You can use the same marked stakes, string, and level method described above to measure the slope of the trench as you dig.
Place Landscaping or Filter Fabric
Look for water-permeable landscaping or filter fabric. This will keep grass and plant roots from encroaching on your ditch! Roots can mess up a perfectly dug ditch. Line the ditch with the fabric. If there is excess fabric, spread it out to the sides. You will use it later.
Add Some Gravel
Cover the landscaping fabric with about three inches of small gravel. The gravel will provide a foundation for the pipes you will lay next.
Place Large Rocks on the Sides
Place the large rocks along the sides of the ditch to help maintain the structure and keep the sides from falling in. While this step is optional, it may help save you from extra digging in the future!
Install the Drain
The drain is located at the beginning of your drainage ditch system. This is the point that allows the water to drain into the pipes and be routed away from your yard and home.
Drain Grate
The drain grate will allow the water to enter the trench and drain out of the pipe. The drain grate should be placed at the point where the water is collecting, like under a downspout or at a low point in the yard. The trench should slope downward from the drain grate.
Drain Outlet
The drain outlet, or catch basin, is installed underneath the drain grate and directs the water into the pipes.
Lay the Drain Pipe
It’s time to install the drainage pipe! You can choose between corrugated or rigid pipes and perforated pipes that drain along the bottom or pipes with a drainage spout. Choose the option that works best for your yard and your project.
Make sure all fittings and connections are secure. Test the drain grate, outlet, and pipe system before you bury it! Watch closely for any leaks. If there are any parts of the pipe that are unsupported by the gravel bed, add more gravel or sand to support the pipe.
Corrugated Pipe
Choose a flexible, corrugated pipe if your trench is not perfectly straight. The only issue with a corrugated pipe is any debris that makes it through the drain may get caught in the channels along the pipe.
Rigid Pipe
Smooth PVC pipes are easy to connect to the drain and other pipes with simple-to-use connectors. These pipes are not flexible, however, so make sure your trench is straight!
Perforated Pipe
This type of drainage process is also known as a French drain. There are perforations or openings along the bottom of the pipe. The water drains through the openings as it runs along the pipe.
There is no need for a drain or spout at the end. Make sure that the pipe is long enough for all the water to disperse before it reaches the end.
Smooth Pipe
Smooth pipe allows the water to flow along the pipe to a drain or spout. Make sure the spout is positioned so that it doesn’t create another water issue! Ideally, it should drain into a storm drain or gravel bed.
Bury the Pipe
The technical part of this project is over! Now, it is time to hide the pipes and make the area look attractive.
Gravel
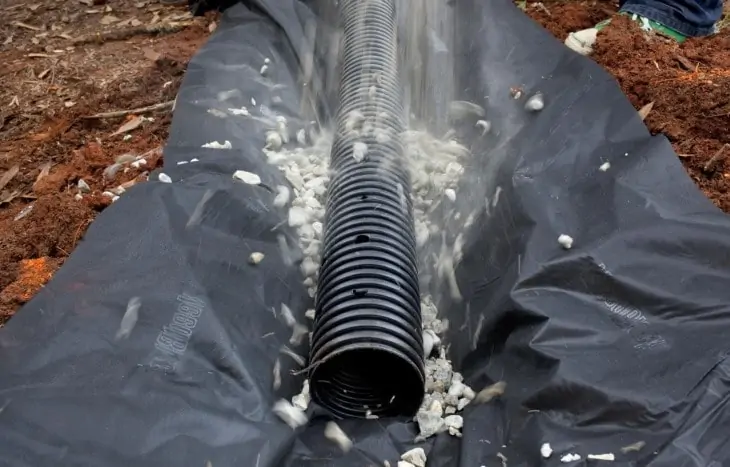
Start with another three-inch layer of gravel. This will protect the pipe and allow for proper drainage.
Landscaping Fabric
If you had extra fabric spread to the sides earlier, bring it up over the gravel and spread it out. If you don’t have excess fabric, you can cover the gravel with another layer of fabric.
Options for Covering the Pipe
Now it is time to be creative! You can make the area invisible by covering the gravel with topsoil and grass seed or sod. Place at least half an inch of topsoil on top of the ditch in order to plant grass in the area.
Alternatively, you can use landscaping elements like rocks and gravel to create a “creek bed” look. Plant ornamental grass, shrubs, and other plants along the edges.
Place a temporary cover over the drain grate while covering the trench with gravel and soil to prevent debris in the grate. Leave the grate uncovered for easy drainage and access.
If you use a smooth pipe and have an open-drain end, place rocks and gravel around the spout. Do not cover the end with soil or gravel.
Maintaining a Drainage Ditch
Thankfully, drainage ditch maintenance is a fairly simple job. If there is grass planted in the area, it may need to be reseeded occasionally. You may notice low points in the ground as it settles around the pipe. Low points can be filled with more gravel and soil, as needed.
Check the drain grate and drain outlet regularly. Dirt and debris may fall into the drain occasionally. Clean the drain as needed by fishing out debris and flushing the drain and pipe with water. If the grate breaks, dig it out and replace it.
If the drainage ditch fails, you may need to dig it up to clean it or replace it. This process is easier if the ditch is covered in gravel or rocks, rather than soil and grass.