

Recessed lighting with a ceiling fan always turns out to be an aesthetic design. Recessed lights are a glamorous addition to any bedroom! Here are some tips for finding the perfect placement and options for your home!
Recessed lights pair extremely well with a ceiling fan! Space lights out by at least half of the ceiling height measurement. Sketch out placement ideas that include the shape/size of the room and where the ceiling fan is. To eliminate the strobing effect, place recessed lights at least 24 inches away from the end of the fan blades.
Table of Contents
Recessed Lighting Options
Recessed lights are lights that are level with the ceiling, installed by cutting a hole in the ceiling (usually drop/false ceilings). They look great in any space and illuminate brightly without taking up headroom.
Ceiling fans are often paired with recessed lights and it is a stylish and bright combo! Recessed lights are usually placed on a dimmer switch, which makes it easy to lower the brightness.
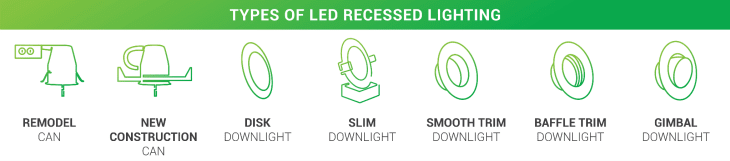
There are many different options for recessed lights. Trims include shiny and reflective, smooth white, colorful and decorative, and much more!
Recessed lights come in different shapes and sizes. If you don’t have much room in your drop ceiling, there are very thin lights available for installation. Here are the different types of LED recessed lights:
LED lights are the best way to go. They not only last nearly 25 times longer than incandescent bulbs, but they’re also much more efficient (higher lumens per watt, or in simpler words, more light for less power).
When installing recessed lights in drop/false ceilings, it’s better to go with LED to avoid giving off too much heat.
Placement with Ceiling Fan
If you’re wondering how far apart to place recessed lights, it can be a good estimate to divide the height of the ceiling by 2. For example, If a room has a ceiling height of 9 feet, lights would likely be spaced 4.5 feet apart.
There’s no specific way to calculate how or where to place recessed lights, but they are generally placed closer together in the kitchen and living room than in other rooms of the home. The reason behind this is that you usually need more light in the kitchen and living room than in your bedrooms and hallways.
Things to Avoid
The strobing effect occurs when the blades cross between a light source and your eyes. In general, the best way to avoid this from all angles is by placing recessed lights at least 24 inches away from the end of the fan blades.
In my own experience, I once placed recessed lights 8 inches from the end of the ceiling fan blades. From certain angles, the strobing effect occurred. Therefore, I recommend you keep a gap of at least 1.5 to 2 feet (18 to 24 inches) between them.
Also, beware of shadows and spotlighting. The further the lights get from the wall, the more likely this will start happening.
It may require some trial and error to determine where to place recessed lights and how you should space them out for optimal light intensity.
Before Installing
When it comes to determining a general idea for placement of recessed lights with a ceiling fan, get some reference pictures from online, draw your own basic layout idea, or visit this recessed lighting calculator.
Here are some spacing options, including tray and multi-layered ceilings:
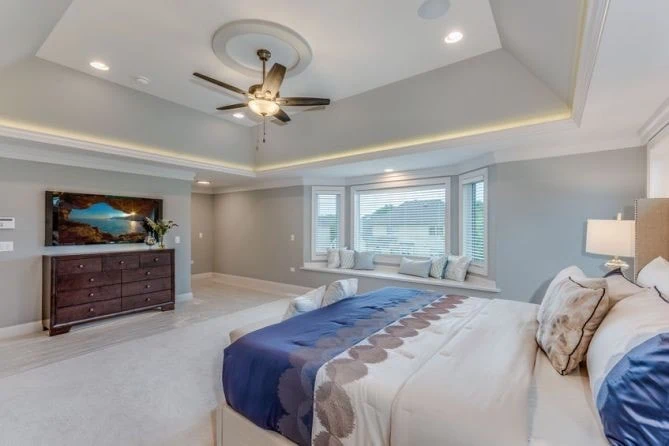
Notice the light above the window and the 4 lights around the fan.
The 4 lights aren’t just in the corners but more like a diamond shape around the ceiling fan.
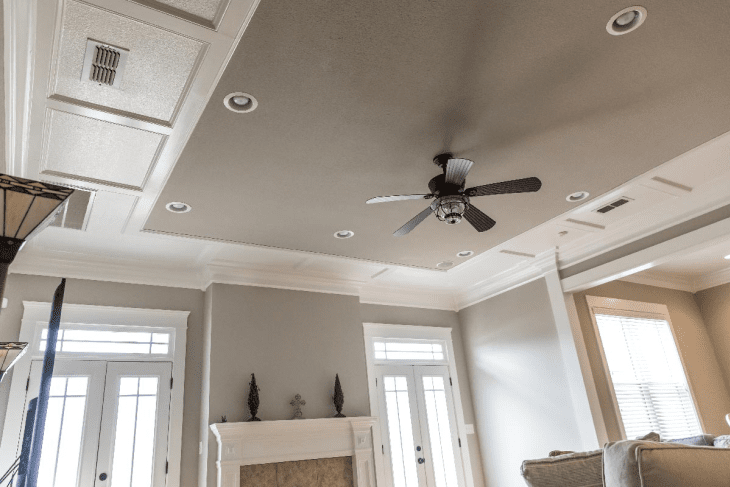
Aim to put lights on any focal points you want to draw attention to, and consider how bright you want the room to be. I recommend starting with a minimum distance of 4 feet between each light and the standard 24 inches from the fan blades.
I wasn’t sure my first layout idea of only 4 lights would be bright enough, so I made a second design on the recessed lighting calculator. I added 8 lights around my ceiling fan and liked this layout enough to start working.
Recessed Lights Installation Tips
Finding the Layout
Once you have a sketch or layout idea, use sanding discs as placeholders for the lights! Sanding discs are only 1 inch smaller than a 6-inch ultra-thin LED recessed (wafer) light, which makes it very suitable for place-holding.
Use a ladder to start placing your sandpaper discs on the ceiling. I highly recommend gloves and using 1 loop of high-end painter’s tape on the back of each disc.
Gloves keep hand oils from leaving marks on the drywall. The painter’s tape will ensure that no residue is left behind.
Throughout the required measuring, math, and sticking, remember not to place lights too far away from the wall or too close to the ceiling fan blades.
After you have settled on the number of lights and the layout, trace around each sandpaper disc with a pencil.
Drilling, Cutting, and Wiring
The installation process varies slightly depending on the type of recessed light and ceiling.
Drop Ceiling Tiles
For drop ceiling tiles, bring the tile in question to a flat work surface before cutting. Measure to find the center of the drawn circle and drill a hole. Use a recessed light hole saw or a utility knife to cut where you marked.
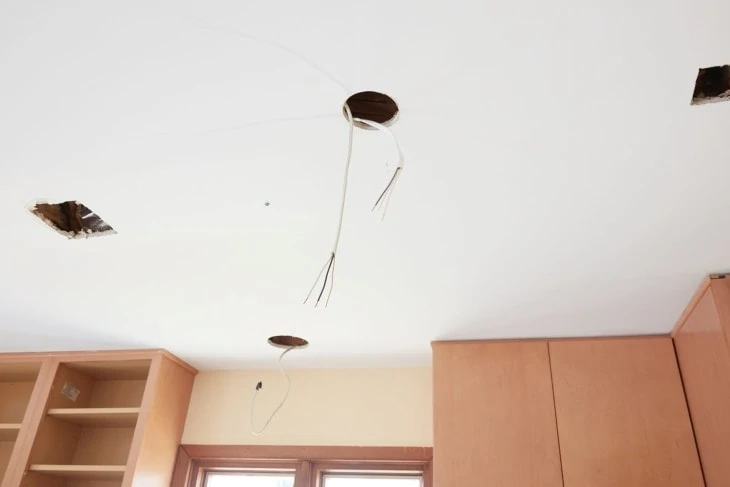
Drywall and False Ceilings
If you’re using a drill to cut where it is, try this nifty hole saw dust bowl to keep any dust from falling on you or the floor.
Remember that the sanding discs are only 5 inches in diameter, and your recessed lights could be 1 inch wider. Run your drill on low speed to avoid some kickback. If you have a toothed hole saw, run it in reverse to reduce grabbing.
Recessed lights come with a mounting strap or brackets that are hidden above the ceiling. They also have templates and instructions that may come in handy!
Be sure to shut off the power before attempting to wire the lights. If you aren’t comfortable working with electrical wiring, it may be a good idea to hire an electrician.
Conclusion
The description on the LED recessed lights says, “You can even complete the installation in minutes!” Maybe longer if you have more than 1.
Overall, LED recessed lights are extremely easy to install and offer light from above that other fixtures just can’t compete with.
By following the tips you learned here today, you’re sure to have the perfect arrangement of recessed lighting around your bedroom ceiling fan!